
[ad_1]
Why It Works
- Melting the cream cheese, butter, and heavy cream over a hot water bath means there’s no need for room temperature ingredients, and whisking them as they melt results in a velvety smooth cheesecake.
- Whisking the meringue at a lower speed for longer results in a stronger foam that’s less likely to deflate.
- Baking the cheesecake at 350°F (175°C) for 15 minutes helps jumpstart its rise; reducing the temperature to 300°F (150°C) allows it to continue cooking without risk of overbaking.
- Baking the cheesecake in a water bath gently and evenly cooks the cheesecake.
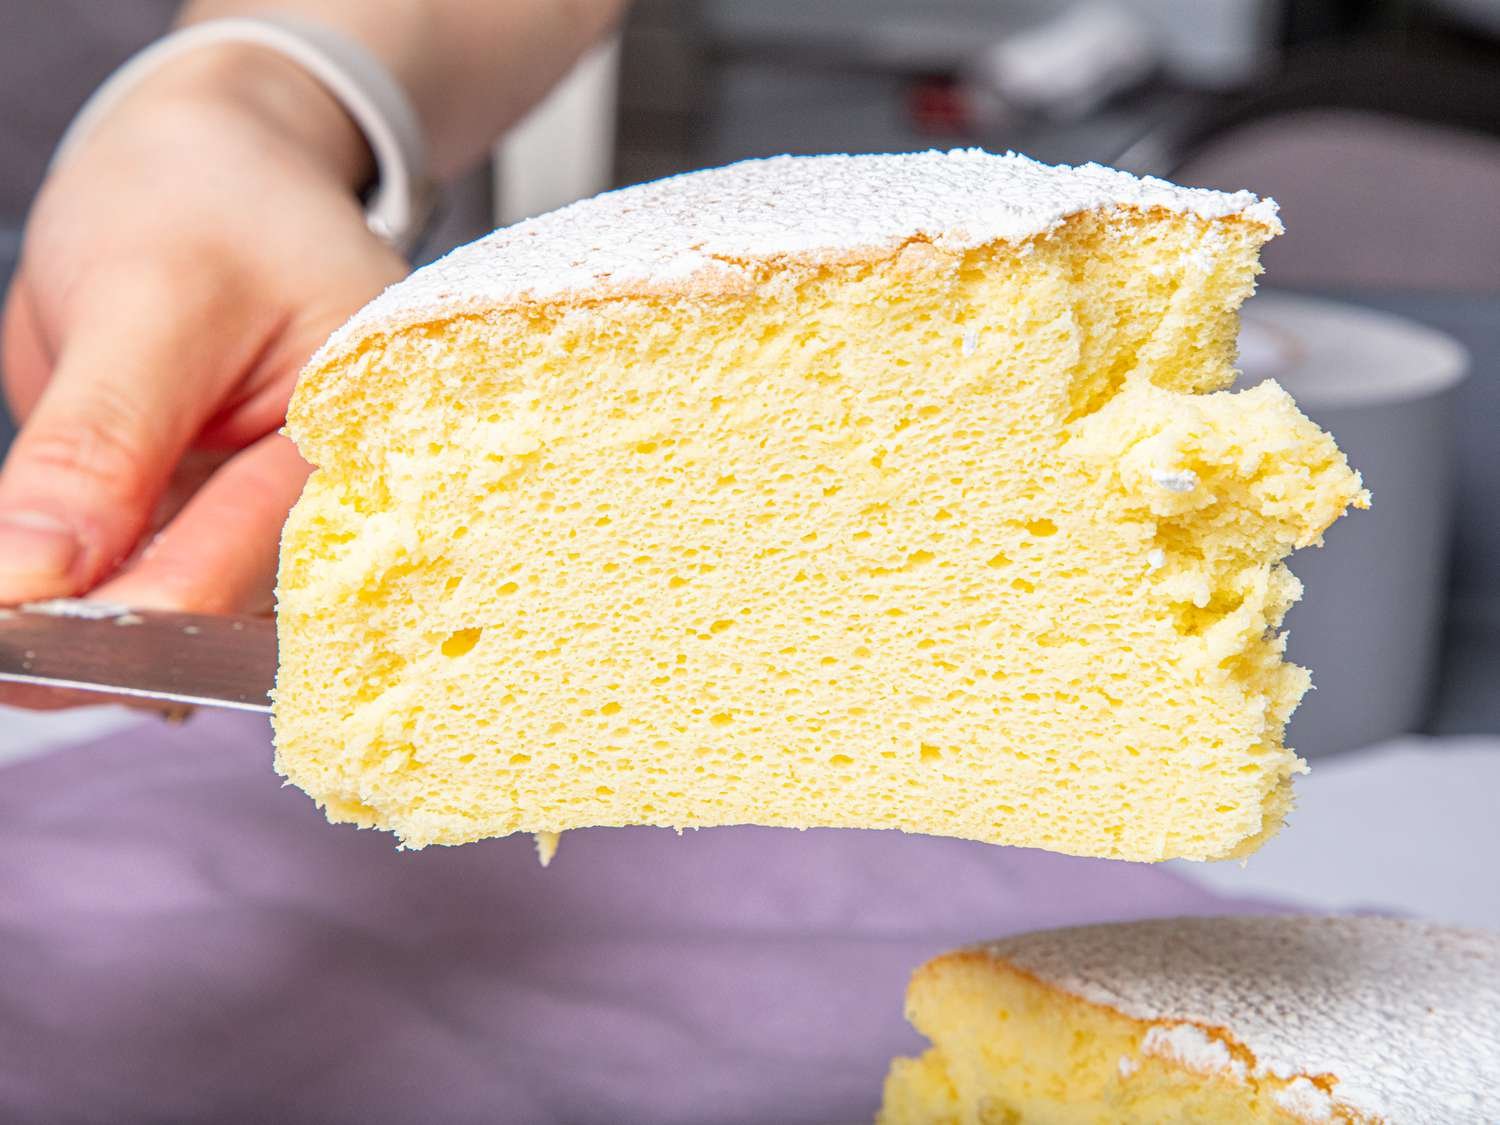
I have yet to meet someone who doesn’t like New York–style cheesecake. It’s luxuriously rich and creamy, with just enough tanginess to balance its sweetness. But sometimes I find myself wanting something a touch lighter. That’s where Japanese cheesecake comes in. Unlike its American cousin, Japanese cheesecake is light and bouncy, with a fluffy, cotton-like texture that comes from whipped egg whites in the batter. It’s subtly sweet and tart, with just the right amount of richness from cream cheese and heavy cream. Like most cheesecakes, it’s delicious on its own and versatile enough to serve with almost any fruit or sauce you’d like.
Making any style of cheesecake can be intimidating—with the risk of lumps, overmixing, and overbaking causing stress—and the addition of whipped egg whites in a Japanese cheesecake can make it even scarier. But making Japanese cheesecake doesn’t have to be anxiety inducing. Below, you’ll find tips that will help you make a bakery-worthy Japanese cheesecake that’s spectacularly light and fluffy.
How to Make a Fluffy Japanese Cheesecake
For the smoothest batter, melt your dairy. Most American cheesecakes are made by beating room temperature cream cheese with the other ingredients using an electric mixer. It’s crucial that the cream cheese is room temperature, otherwise you may end up with a lumpy batter. Japanese cheesecakes, however, are made by melting and whisking the cream cheese, butter, and heavy cream (or sour cream in some recipes)together in a bowl set over a pot of simmering water. This method means there’s no need to take your dairy out of the fridge ahead of time, and also guarantees that your batter is lump-free and silky smooth.
Add a little flour and cornstarch. Though the cheesecake gets much of its structure from whipped egg whites, a small quantity of flour and cornstarch help set and stabilize the batter. This reduces the risk of it deflating after it’s cooled, while also making the cake easier to slice.
Whisk the egg whites slower for longer. As I’ve touched on previously in my chocolate mousse and meringue cookie recipes, whisking egg whites on a lower speed for longer results in a more stable foam that’s less likely to collapse. It also guarantees that the sugar dissolves properly and prevents you from overbeating your meringue, which will become lumpy and break your cheesecake batter, resulting in a cake that won’t rise.
Gently fold the egg whites into the batter. I incorporate a third of the meringue into the cream cheese and egg white mixture first, which lightens up the batter and makes it easier to add the remaining egg white. It’s crucial to fold the meringue with a flexible spatula gently, and you want to mix the batter until just combined and no streaks remain. Work too quickly and aggressively, and you risk deflating the egg foam you worked so hard to make.
Keep an eye on the oven temperature—and bake the cheesecake in a water bath. Though most cheesecakes bake at low temperatures ranging from 225°F (110°C) to 300°F (150°C), I start my Japanese cheesecake at 350°F. Not only does this jump-start its rise, but it also gives the cake its signature tan top. In my testing, I found that cheesecakes started at a lower temperature often did not have that nice brown hue, and that starting the cheesecake at 350°F was essential in giving the cake its color. To prevent overbaking the cheesecake, I bake it in a water bath—and reduce the oven temperature to 300°F once the top begins to color.
I love serving this cheesecake simply dusted with confectioners’ sugar, and it’s also great mounded with macerated fruit, such as strawberries or peaches. And with a cheesecake this light and airy, I usually have room for a second slice.
Serious Eats / Amanda Suarez
How to Make the Silkiest, Airiest Japanese Cheesecake Ever
Cook Mode
(Keep screen awake)
-
56 g unsalted butter (2 ounces; 4 tablespoons), cut into 1-inch cubes, plus more for greasing
-
43 g all-purpose flour (1 1/2 ounces; 1/3 cup), plus more for dusting
-
1 (8-ounce) package cream cheese, cut into 1-inch cubes
-
1/2 cup (120 ml) heavy cream
-
1/4 teaspoon Diamond Crystal kosher salt; for table salt, use half as much by volume
-
6 large eggs, yolks and whites separated
-
15 g cornstarch (1/2 ounce; 2 tablespoons)
-
1/4 teaspoon cream of tartar
-
1 tablespoon (15 ml) lemon juice from 1 medium lemon
-
80 g granulated sugar (about 2 3/4 ounces; 1/2 cup plus 2 tablespoons)
-
Confectioners’ sugar, for dusting (optional)
-
Adjust oven rack to lower-middle position and preheat to 350ºF (175ºC). Grease an 8- by 3-inch round springform pan with unsalted butter, then dust with flour, shaking out excess. Using aluminum foil, wrap bottom half of the pan to create a waterproof seal. Set in a roasting pan.
Serious Eats / Amanda Suarez
-
In a large heatproof mixing bowl, combine cream cheese, butter, heavy cream, and salt. Set mixing bowl over a saucepan of simmering water. (Make sure bottom of bowl does not touch the water.) Cook, whisking frequently, until mixture is smooth and creamy and butter has melted, 3 to 5 minutes. Remove from heat. Add egg yolks and whisk until well combined and no streaks remain, about 1 minute. Using a fine-mesh sieve, sift in flour and cornstarch, and whisk until smooth; set aside.
Serious Eats / Amanda Suarez
-
In the bowl of a stand mixer fitted with the whisk attachment or using a hand mixer and a large bowl, begin whipping egg whites at low speed until whites look wet and frothy, about 1 minute. With the mixer running, add cream of tartar and lemon juice and mix until cream of tartar is dissolved, about 10 seconds.
Serious Eats / Amanda Suarez
-
Keeping the mixer at low speed, slowly add about a quarter of the sugar in a steady stream. Increase speed to medium and slowly add remaining sugar. Continue mixing at medium speed until meringue is thick and glossy and holds firm peaks when you lift the whisk, about 10 minutes.
Serious Eats / Amanda Suarez
-
Using a flexible spatula, scrape 1/3 of the meringue into the cream cheese mixture, and gently fold until smooth. Add the remaining meringue, and continue folding cake batter until just combined and no streaks remain. Do not overmix.
Serious Eats / Amanda Suarez
-
Scrape batter into prepared springform pan and set roasting pan on oven rack. Pour about 2 inches hot water into the roasting pan, and bake until cheesecake top begins to turn light golden brown, about 15 minutes. Reduce oven temperature to 300ºF, and continue baking until cake is firm but still jiggly, another 45 minutes to 1 hour. Turn oven off and leave door slightly ajar; let cake cool in oven for 30 minutes. Remove cake from oven. Carefully slide an offset spatula around the edges of the cake pan, then remove sides of the pan. Let cake cool completely on a wire rack. Cake can be served immediately or refrigerated until chilled. For a creamier, denser cheesecake, serve chilled; for a lighter, fluffier cheesecake, serve at room temperature. Dust cake with confectioners’ sugar just before serving, if desired.
Serious Eats / Amanda Suarez
Serious Eats / Amanda Suarez
Special Equipment
8- by 3-inch round springform pan, aluminum foil, roasting pan, large heatproof mixing bowl, stand mixer, flexible spatula, wire rack
Make-Ahead and Storage
The cake can be made up to 3 days in advance, loosely wrapped in plastic and refrigerated. Dust with confectioners’ sugar just before serving, if desired. Leftover can be stored in a tightly sealed container in the refrigerator for up to 3 days.
[ad_2]
Source link